Tents 101: Mountaineer coach’s step-by-step guide from shopping to pitching
MANILA, Philippines — As summer approaches, camping remains as among the most preferred activities to do. In fact, according to Google, camping is the eighth most searched summer activity to date.
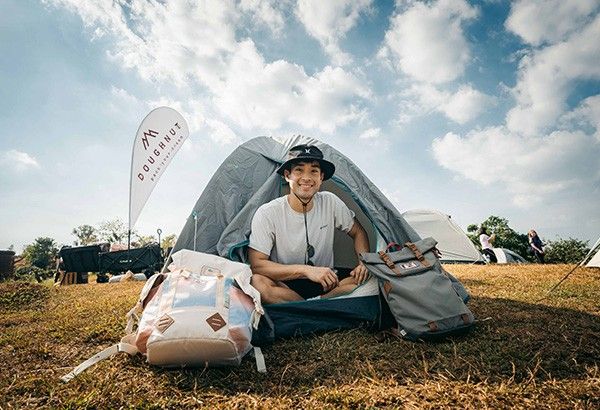
Mountaineer coach Emmanuel Batungbacal demonstrated the proper way to assemble a tent at the recent Summer Happy Camp in Viewscape Nature Park in Tanay, Rizal, organized by bag label Doughnut.
Don’t know how to pitch a tent? Here’s the proper way to do it, according to Batungbacal:
1. When shopping for an outdoor tent, use one that comes in earth tones.
According to Batungbacal, the world’s biggest outdoor sporting brands convened and had a consensus to only sell tents in natural colors.
“Before, we used to have bright pink, bright orange. Those are okay if you’re in an Alpine location, for safety reasons. But if you are in a tropical setting especially in a virgin forest, if you introduce bright colors that are not natural in the environment… this affects animals’ and insects’ mating cycle,” he expounded.
There are different types of tents to choose from, he said. First, there is the freestanding dome that could stand on its own without pegs.
“Ideally, when you are going to go camping, your tent should be freestanding,” he said.
A tent, typically, only has three parts: the poles, the body and the fly.
2. Find a perfect ground to pitch a tent on.
Something stable is ideal. Stay away near slopes or cliffs as you and your tent might roll downhill. Avoid areas with or near tall grass as your tent might become easy target for snakes, rats, predators and other insects and animals.
“Don’t pitch a tent in a very flat surface,” Batungbacal warned, “because when it rains, the water would run through the tent. So slightly sloping, that’s the most ideal. As much as possible, somewhere where there is some grass for natural cushioning.”
He underscored the importance of finding a good view and make sure your tent’s opening faces the view, so that when you wake up in the morning, it is the first thing that you would see. Also, a location near a water source is good.
“Don’t pitch your tent under a tree or anthill. If you peg it over an anthill, your tent would have a hole and I assure you, you won’t be sleeping at all.”
3. Make sure to zip up or close all closures of the tent first before assembling it so you could easily identify its shape and features.
4. Connect the tent’s poles first.
Make sure that the area is clear and you are not pitching near another person or else, you might poke the person’s eye accidentally with the pole.
According to Batungbacal, tents’ poles are usually made of fiberglass or aluminum. He said he preferred the sturdier aluminum.
5. Lay out the flat tent on the ground, then position the poles over the tent’s body on the ground.
Poles are usually positioned like an X over a small tent. Once the poles are flat on the body, insert the poles’ legs into the slots on the tent’s edges one by one.
The poles should have rubber so they would stay in place, Batungbacal noted.
6. Hook the rest of the tent into the poles from the bottom up.
It is better if you have a friend who can help you simultaneously hook the other sides of the tent.
7. Maintain proper distance from another tent.
This, said Batungbacal, is especially helpful when your neighbor snores.
8. The proper way of putting the peg is 45 degrees toward the tent.
If the peg is already firmly fixed on the ground, secure it not with your hand as you might get injured. Bury the peg on the ground by stepping on it wearing proper footwear, Batungbacal recommended.
Before pegging the tent’s other poles on the ground, stretch the sides of the tent first to make sure it is stretched enough, otherwise, it would have gaps when pegged.
“You have to pull it one corner at a time to make sure the tent really sticks out,” Batungbacal instructed.
9. If you are to put a fly or an added layer of protection over the tent, make sure to create a vestibule or a distance between the fly and the tent, so it would act like an umbrella over the tent.
10. Make sure that the tent has ventilation and door.
If there are extra cord lines attached into the fly, peg these too on the ground to create more room for ventilation and to secure the tent especially against strong winds.
“The higher the tent, the higher the wind resistance, that’s why we mountaineers, we prefer smaller, lower tents,” Batungbacal explained.
As an ideal companion for the camping tent, Doughnut introduced its Explorer, Wares (which can be carried as a backpack or tote), Grounder, Christopher, and Colorado cabin-friendly bags designed to complement the outdoors.
For daily use, there are medium-sized bag options such as the Pyramid (carry it as a backpack, a cross-body, with an added feature of also including a hanging toiletry pack), the Plus One Mini, or the Christopher Small bag that features a roll-top closure with buckle to easily expand space as needed. For quick errands or concerts, there is the Pyramid Tiny bag or the Seattle bag.
Completing one’s camping must-haves are camping gear from Chris Sports, insulated tumblers from Stanley, playing cards from Bicycle Cards, and Victorinox Swiss Army Knives. — Video by Deni Bernardo, video editing by Anjilica Andaya


